
In this tutorial, I will show you how you can implement a fingerprint authentication system in flutter for android application. nowadays many phones are equipped with a fingerprint sensor which makes login and local authentication easier for the user and more secure than using a password.
Setting up our project
before we start coding the app we need to set up a couple of things first.
the first thing that we need to do is to add the local_auth dependencies inside our pubspec.yaml file
dependencies:
  local_auth: ^0.4.0+1
so for my project, I used this version but you may use a recent version so I recommend you to check this link and see which version you can use: pub.dev/packages/local_auth/install
also, make sure that your SDK version is compatible with the library version.
now we need to add the user-permission inside the AndroidManifest.xml file.
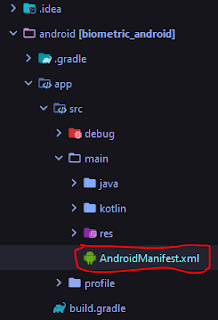
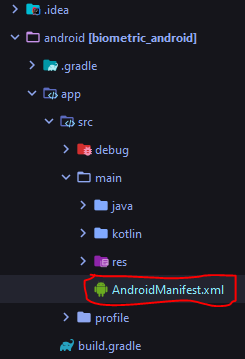
 |
AndroidManifest.xml |
for our example we will only implement this feature for an android phone, for IOS it's not the same, but you can learn how to do it by visiting the documentation inside the link below.
The code
now let's open our main.dart file and start coding the app. for the layout I just added a button that will allow us to authenticate and I added 3 Text that will give us some information, it will not be something fancy. I'm not going to show you the code of the layout here, but I will give you the full source code of the project at the end of the article so you can check it.
Now let's start by importing the important packages, so after the Material Package import these two packages
import 'package:local_auth/local_auth.dart';
import 'package:flutter/services.dart';
now we will add 4 main variables
LocalAuthentication auth = LocalAuthentication();
bool _canCheckBiometric;
List<BiometricType> _availableBiometric;
String autherized = "Not autherized";
let me explain to you the role of each one
- the auth object will give us the main function that we will need to authenticate using our fingerprint
- the _canCheckBiometric is a boolean that will tell us if we have a biometric sensor or not
- the _availableBiometric is a list of object that will give us the different biometric available in our device, like the fingerprint or the faceID
- the authorized is a string that will tell us if we are authenticated or not
now we will start coding 3 functions
//checking bimetrics
//this function will check the sensors and will tell us
// if we can use them or not
Future<void> _checkBiometric() async{
bool canCheckBiometric;
try{
canCheckBiometric = await auth.canCheckBiometrics;
} on PlatformException catch(e){
print(e);
}
if(!mounted) return;
setState(() {
_canCheckBiometric = canCheckBiometric;
});
}
//this function will get all the available biometrics inside our device
//it will return a list of objects, but for our example it will only
//return the fingerprint biometric
Future<void> _getAvailableBiometrics() async{
List<BiometricType> availableBiometric;
try{
availableBiometric = await auth.getAvailableBiometrics();
} on PlatformException catch(e){
print(e);
}
if(!mounted) return;
setState(() {
_availableBiometric = availableBiometric;
});
}
//this function will open an authentication dialog
// and it will check if we are authenticated or not
// so we will add the major action here like moving to another activity
// or just display a text that will tell us that we are authenticated
Future<void> _authenticate() async{
bool authenticated = false;
try{
authenticated = await auth.authenticateWithBiometrics(
localizedReason: "Scan your finger print to authenticate",
useErrorDialogs: true,
stickyAuth: false
);
} on PlatformException catch(e){
print(e);
}
if(!mounted) return;
setState(() {
autherized = authenticated ? "Autherized success" : "Failed to authenticate";
});
}
Note that the second function that will return the list of objects may return an empty list if you hadn't yet set up the fingerprint security inside your emulator or your device, so to fix that open the setting of the phone go to security and add a fingerprint authentication, then restart the app and you will see that the fingerprint is detected.
Now that we have created all the functions and the variables that we will need let's call them. so the 2 first function will be called inside an InitState function which will check the biometric before rendering the layout of the app and the authentication function will be called when we press the button.
now that we have done the major part of the app let me show you the full source code.
import 'package:flutter/material.dart';
import 'package:local_auth/local_auth.dart';
import 'package:flutter/services.dart';
void main() => runApp(MaterialApp(
home: AuthApp(),
));
class AuthApp extends StatefulWidget {
@override
_AuthAppState createState() => _AuthAppState();
}
class _AuthAppState extends State<AuthApp> {
LocalAuthentication auth = LocalAuthentication();
bool _canCheckBiometric;
List<BiometricType> _availableBiometric;
String authorized = "Not authorized";
//checking bimetrics
//this function will check the sensors and will tell us
// if we can use them or not
Future<void> _checkBiometric() async{
bool canCheckBiometric;
try{
canCheckBiometric = await auth.canCheckBiometrics;
} on PlatformException catch(e){
print(e);
}
if(!mounted) return;
setState(() {
_canCheckBiometric = canCheckBiometric;
});
}
//this function will get all the available biometrics inside our device
//it will return a list of objects, but for our example it will only
//return the fingerprint biometric
Future<void> _getAvailableBiometrics() async{
List<BiometricType> availableBiometric;
try{
availableBiometric = await auth.getAvailableBiometrics();
} on PlatformException catch(e){
print(e);
}
if(!mounted) return;
setState(() {
_availableBiometric = availableBiometric;
});
}
//this function will open an authentication dialog
// and it will check if we are authenticated or not
// so we will add the major action here like moving to another activity
// or just display a text that will tell us that we are authenticated
Future<void> _authenticate() async{
bool authenticated = false;
try{
authenticated = await auth.authenticateWithBiometrics(
localizedReason: "Scan your finger print to authenticate",
useErrorDialogs: true,
stickyAuth: false
);
} on PlatformException catch(e){
print(e);
}
if(!mounted) return;
setState(() {
authorized = authenticated ? "Autherized success" : "Failed to authenticate";
});
}
@override
void initState() {
// TODO: implement initState
_checkBiometric();
_getAvailableBiometrics();
}
@override
Widget build(BuildContext context) {
return SafeArea(
child: Scaffold(
body: Column(
children: <Widget>[
Center(
child: RaisedButton(
onPressed: _authenticate,
child:Text("Get Biometric"),
),
),
Text("Can check biometric: $_canCheckBiometric"),
Text("Available biometric: $_availableBiometric"),
Text("Current State: $authorized"),
],
),
),
);
}
}
Fingerprint authentication in flutter
 Reviewed by Medics
on
July 22, 2020
Rating:
Reviewed by Medics
on
July 22, 2020
Rating:
Reviewed by Medics
on
July 22, 2020
Rating:


I/flutter ( 5884): PlatformException(NotAvailable, Required security features not enabled, null, null)
ReplyDeleteany solution please ????
Nice blog! I really loved reading through this Blog... Thanks for sharing.......
ReplyDeleteInwizards Technology
flutter app development
flutter app development company