
In this tutorial, I'm will show you how to make a simple user authentication system using Firebase and Flutter.
In this post, I'm not going to explain what is Flutter and how to use it, so you should have a least the basic knowledge of Flutter and Dart programming language.
Firebase ? what is it
before we start coding let's talk about Firebase. Firebase is a platform developed by Google for creating mobile and web applications. In other words it will help you to make the back end of your application faster and easier. Firebase provide many services for developer like user authentication service, firestore, real time database and way more that's why it's so important to learn it and master it if you plan to get a job or to be a freelancer because many client are asking for app that use this technology
Setting up our project
first of all I invite you to sign up to firebase by going to this link: firebase.google.com
after you signed in your account just create a new project on the home page and follow these steps
1- Create a new project

2- Follow the steps bellows, give your project a name

3-You can disable the firebase analytic, because we will not use it for this tutorial

4-Wait it until it load and then click on continue


5- Now a new windows will open. Click on the android Icon button to add you android app to firebase

6- give your project a name and follow the steps

for the app id you will find it inside the build.gradle file inside your app folder

Now continue the others steps and read cerfully the documentation and the placement of each files the click on next and run your app to establish a connection between your app and the server. when the connection is established, we have to add the authentication package inside the pubspec.yaml file and start coding
Add the firebase auth package
before we start coding our app ther's a last step that we have to do.
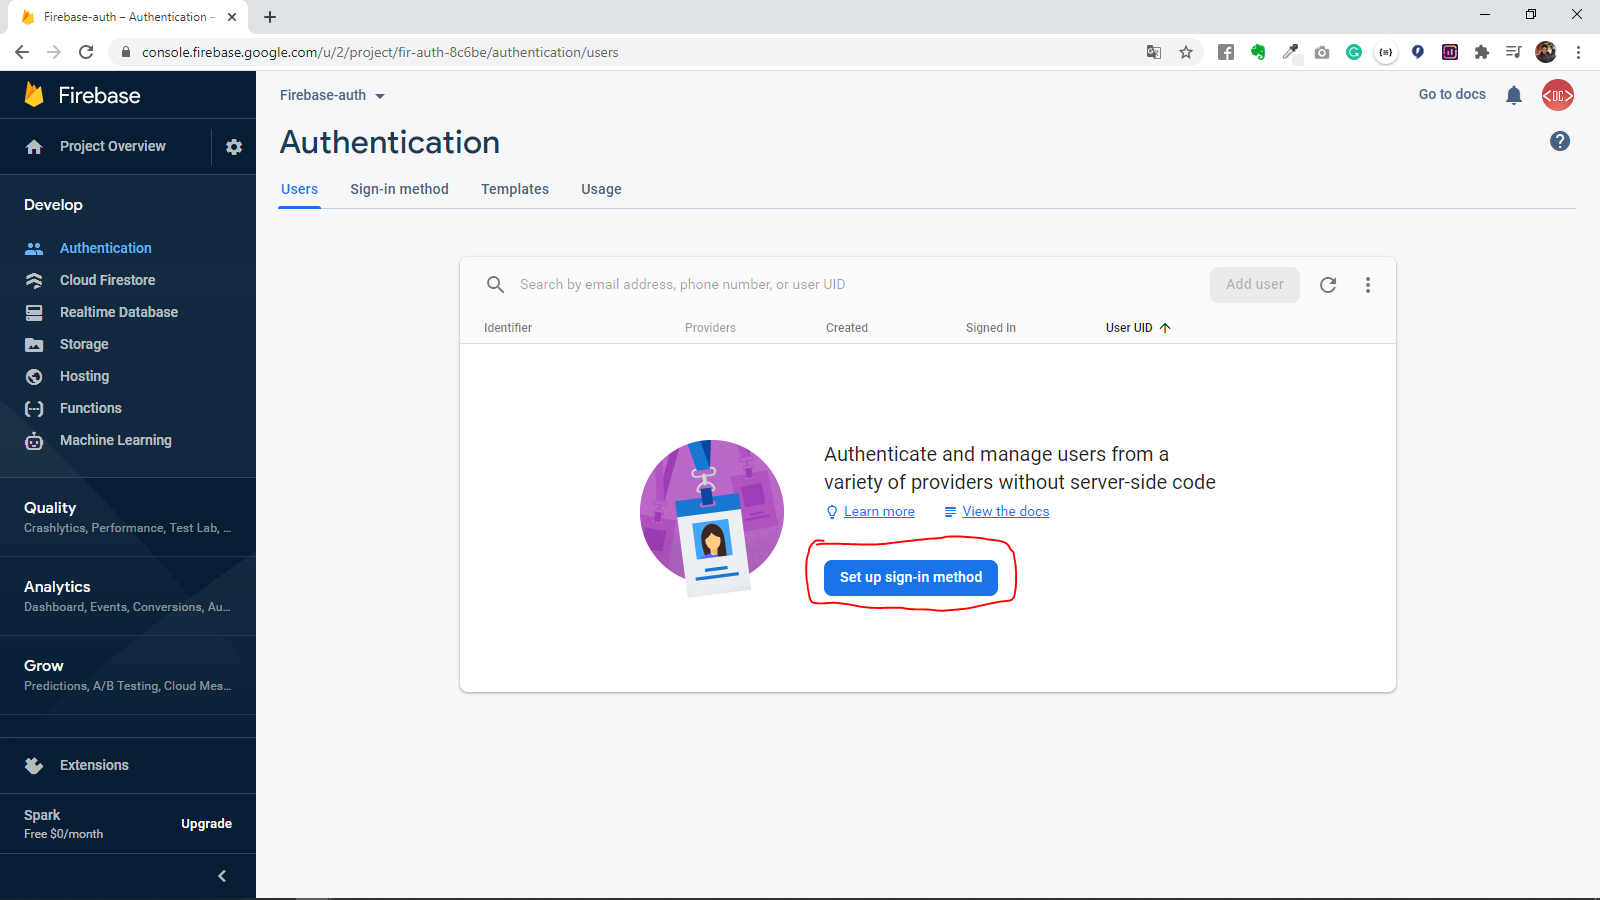
Open your firebase authentication console and click on Authentication

Now click on choose login method and choose E-mail & password


In the bottom of our signing method list, you will find a method called "sign in anonymously" you can enable it because we will use it to test our app.
Now that the setup process is done let's start coding our app
Creating the layout of the app
First of all, create a new dart file and call it for example authpage.dart and add this code, so as you can see I placed some comment for our login system code placement to make it easier for you to follow me.
import 'package:firebase_auth/firebase_auth.dart';
import 'package:firebase_core/firebase_core.dart';
import 'package:flutter/material.dart';
import 'authsystem.dart';
class LoginPage extends StatefulWidget {
@override
_LoginPageState createState() => _LoginPageState();
}
class _LoginPageState extends State<LoginPage> {
//Instancite the FirebaseAuth var _myEmailController = TextEditingController();
var _myPasswordController = TextEditingController();
@override
void dispose() {
_myEmailController.dispose();
_myPasswordController.dispose();
super.dispose();
}
@override
Widget build(BuildContext context) {
return Scaffold(
appBar: AppBar(
title: Text("Login Firebase"),
),
body: Padding(
padding: const EdgeInsets.all(24.0),
child: Column(
children: [
TextField(
controller: _myEmailController,
decoration: InputDecoration(
hintText: "Email",
filled: true,
fillColor: Colors.grey[10],
border: InputBorder.none),
),
SizedBox(
height: 20.0,
),
TextField(
controller: _myPasswordController,
obscureText: true,
decoration: InputDecoration(
hintText: "password",
filled: true,
fillColor: Colors.grey[10],
border: InputBorder.none),
),
SizedBox(
height: 20.0,
),
Center(
child: RaisedButton(
onPressed: () {
print("Email:${_myEmailController.text}");
print("Email:${_myPasswordController.text}");
/** Here we are going to place our sign in with email code */
},
child: Text(
"Login",
style: TextStyle(color: Colors.white),
),
color: Colors.amber,
),
),
Text("Or"),
RaisedButton(
onPressed: () {
/** Here we are going place our Authentication System Code */
},
child: Text("sign in as guest"),
color: Colors.amber,
)
],
),
),
);
}
}
Now let's return to our main.dart file and add some code because, as you may know, firebase is constantly updating and in the latest update of 2020, we have to initialize our app before we can use firebase that's why we added the firebase_core package in our app. so we have to make a Future builder to make it easier for us to catch errors
main.dart
import 'package:flutter/material.dart';
import 'package:loginsys/authsystem.dart';
import 'package:firebase_core/firebase_core.dart';
import 'authpage.dart';
void main() {
runApp(MaterialApp(
home: AuthenticationExample(),
));
}
class AuthenticationExample extends StatefulWidget {
@override
_AuthenticationExampleState createState() => _AuthenticationExampleState();
}
class _AuthenticationExampleState extends State<AuthenticationExample> {
@override
Widget build(BuildContext context) {
return FutureBuilder(
future: Firebase.initializeApp(),
builder: (context, snapshot) {
if (snapshot.hasError) {
return Center(
child: Text("Someting went Worng"),
);
}
if (snapshot.connectionState == ConnectionState.done) {
return LoginPage();
}
return Center(
child: CircularProgressIndicator(),
);
},
);
}
}
Now that we initialized our app, and created our layout it's dive to our main function which is the login function.
Anonymous sign-in with Firebase and Flutter
we will start with the easiest way to login with firebase and it's the anonymous login or guest login. this part is very simple, first, we are going to create an instance of FirebaseAuth and we are going to use the SignInAnonymously method
Now just after the the intaite auth comment add this line
//Instanciate the AuthService Class
final FirebaseAuth _auth = FirebaseAuth.instance;
And now inside the the Raised button of our anonymous login add this function just inside the OnPressed method
/** Here we are going place our Anonymous Authentication System Code */
_auth.signInAnonymously().then((UserCredential user) {
Navigator.of(context).push(MaterialPageRoute(
builder: (context) => LandingPage(),
));
});
And finally let's create a landing page function which allow us to land when we login
landingpage.dart
import 'package:flutter/material.dart';
class LandingPage extends StatefulWidget {
@override
_LandingPageState createState() => _LandingPageState();
}
class _LandingPageState extends State<LandingPage> {
@override
Widget build(BuildContext context) {
return Scaffold(
body: Center(
child: Text("Welcome Sir"),
),
);
}
}
and that's it for our login function, if you run your app and click on the sign in as guest button you will be landed to that page and when you open your firebase console you will find that a new user was added to your users list
In the Next Tutorail we Will see how to login in using email and password and also how to create a registration form and create a sign up function.
Make a User Authentication using Firebase and Flutter
 Reviewed by Medics
on
October 10, 2020
Rating:
Reviewed by Medics
on
October 10, 2020
Rating:
Reviewed by Medics
on
October 10, 2020
Rating:


No comments: